this
- author:
javieralso
- created: 2010-10-01
- source / edit
- categories: recipe
- migrated from node/1405

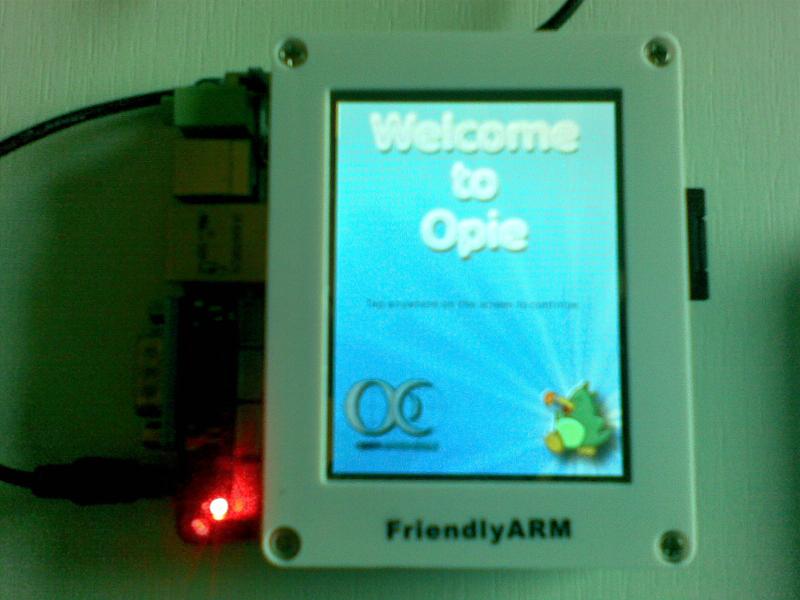
Imagen OPIE para tu FriendlyARM
En anteriores recetas escribí sobre cómo compilar e instalar u-boot en una tarjeta mini2440, cómo compilar Linux para la misma tarjeta y finalmente sobre como prepararle una bonita imagen Emdebian. Ahora, para terminar, vamos a compilar una imagen Opie haciendo uso de la toolchain OpenEmbedded.
Introducción
Opie, acrónimo de Open Palmtop Integraged Environment, es un entorno gráfico para dispositivos empotrados del tipo Handheld, de código libre y basado en Qtopia, que actualmente es propiedad del gigante finlandés Nokia (tras comprar Trolltech, empresa que lo desarrollaba). Opie está basado en ipkg para la gestión de paquetes y ofrece un completo conjunto de aplicaciones junto con su código fuente para la gestión de éste tipo de dispositivos. Además, soporta perfectamente el control mediante pantalla táctil. OpenEmbedded, por su parte, es una toolchain para compilación cruzada orientado a compilar aplicaciones y distribuciones GNU/Linux sobre dispositivos empotrados. Básicamente consiste en un conjunto de scripts (llamados tareas en OpenEmbedded), que son leídos por bitbake, una herramienta de compilación automática al estilo de make para compilar cualquier tipo de imagen o paquete software pero mas orientado a sistemas empotrados.Requisitos para la creación de la imagen
Para poder compilar Opie deberemos tener instalados bitbake y git. Lo de siempre, para qué repetirlo... Además necesitaremos bastante espacio libre en el disco duro (yo lo intenté con un disco que tenía cerca de 40GB libres y la compilación se paró porque no quedaba espacio libre). El proceso de creación de la imagen consiste en descargar todos los fuentes necesarios, los parches correspondientes, aplicar éstos últimos y compilar con un compilador cruzado. Nosotros no deberemos preocuparnos por instalar el compilador ni nada por el estilo, ya que bitbake se encargará de compilar toda la toolchain e instalarla antes de proceder la la creación de la imagen propiamente dicha..Configuración de bitbake y compilación de Opie
Lo primero antes de empezar a hacer nada es crear la jerarquía de directorios sobre la que se realizará la compilación. En nuestro caso tan solo será necesario crear un directorio en el que se desplegará todo el proceso de compilación y dentro de éste directorio un subdirectorio llamado build/conf (el nombre de éste subdirectorio es importante).javieralso@rigoberto:~$ mkdir -p OE/build/conf
javieralso@rigoberto:~$ cd OE/build/conf# Use this to specify where BitBake should place the downloaded sources into
DL_DIR = "/home/javieralso/OE/sources"
# Delete the line below. Then specify which .bb files to consider for
# your build. Typically this will be something like BBFILES = "/path/to/openembedded/recipes/*/*.bb"
BBFILES := "/home/javieralso/OE/openembedded/recipes/*/*.bb"
# Use the BBMASK below to instruct BitBake to _NOT_ consider some .bb files
# This is a regulary expression, so be sure to get your parenthesis balanced.
#BBMASK = "bluez*"
# Uncomment this if you want to use a prebuilt toolchain. You will need to
# provide packages for toolchain and additional libraries yourself. You also
# have to set PATH in your environment to make sure BitBake finds additional binaries.
# ASSUME_PROVIDED += "virtual/${TARGET_PREFIX}gcc virtual/libc"
# Uncomment this if you're building for an arch that uses emulated locale
# generation under qemu (mainly arm glibc) and have an external gcc 3.x compiler
# that OE recognises. This will mean the gcc-native build is skipped, speeding
# builds up.
# ASSUME_PROVIDED += "gcc3-native"
# Uncomment this if you are building Linux 2.4 Embedix kernels.
# i.e. openzaurus-sa-2.4.18 and openzaurus-pxa-2.4.18 - and don't forget
# to rename the binaries as instructed in the Wiki.
# Most users do not need this anymore thankfully!
# ASSUME_PROVIDED += "virtual/arm-linux-gcc-2.95"
# Select between multiple alternative providers, if more than one is eligible.
PREFERRED_PROVIDERS = "virtual/qte:qte virtual/libqpe:libqpe-opie"
PREFERRED_PROVIDERS += " virtual/libsdl:libsdl-x11"
PREFERRED_PROVIDERS += " virtual/${TARGET_PREFIX}gcc-initial:gcc-cross-initial"
PREFERRED_PROVIDERS += " virtual/${TARGET_PREFIX}gcc-intermediate:gcc-cross-intermediate"
PREFERRED_PROVIDERS += " virtual/${TARGET_PREFIX}gcc:gcc-cross"
PREFERRED_PROVIDERS += " virtual/${TARGET_PREFIX}g++:gcc-cross"
# Uncomment this to specify where BitBake should create its temporary files.
# Note that a full build of everything in OpenEmbedded will take GigaBytes of hard
# disk space, so make sure to free enough space. The default TMPDIR is
# /tmp
# Don't use symlinks in in the path to avoid problems
# TMPDIR = /usr/local/projects/oetmp
# Uncomment this to specify a machine to build for. See the conf directory
# for machines currently known to OpenEmbedded. This will automatically take care
# of TARGET_ARCH
MACHINE = "mini2440"
# Use this to specify the target architecture. Note that this is only
# needed when building for a machine not known to OpenEmbedded. Better use
# the MACHINE attribute (see above)
# TARGET_ARCH = "arm"
# Use this to specify the target operating system. The default is "linux",
# for a normal linux system with glibc. Set this to "linux-uclibc" if you want
# to build a uclibc based system.
# Normally the DISTRO of your choosing will take care of this
TARGET_OS = "linux"
# TARGET_OS = "linux-uclibc"
# Uncomment this to select a distribution policy. See the conf directory
# for distributions currently known to OpenEmbedded.
# Although it no longer contain version number in the (file-)name
# openzaurus-unstable is a so called "versioned" distro, i.e. they
# explicitely select specific versions of various packages.
# Stay away from unversioned distros unless you really know what you are doing
DISTRO = "angstrom-2008.1"
# So far, angstrom.conf sets ENABLE_BINARY_LOCALE_GENERATION
# to generate binary locale packages at build time using qemu-native and
# thereby guarantee i18n support on all devices. If your build breaks on
# qemu-native consider disabling ENABLE_BINARY_LOCALE_GENERATION (note that
# this breaks i18n on devices with less than 128MB RAM) or installing
# a working third-party qemu (e.g. provided by your distribution) and
# adding qemu-native to ASSUME_PROVIDED. Caveat emptor, since third-party
# qemus lack patches needed to work with various OE targets.
ENABLE_BINARY_LOCALE_GENERATION = "1"
# ASSUME_PROVIDED += "qemu-native"
# If ENABLE_BINARY_LOCALE_GENERATION is set to "1", you can limit locales
# generated to the list provided by GLIBC_GENERATE_LOCALES. This is huge
# time-savior for developmental builds. Format: list of locale.encoding pairs
# with spaces as separators.
GLIBC_GENERATE_LOCALES = "es_ES.UTF-8"
# Uncomment this to select a particular major kernel version if the MACHINE setting
# supports more than one major kernel version. Currently this is suported by the
# following MACHINE types: poodle, tosa and simpad.
MACHINE_KERNEL_VERSION = "2.6"
# Uncomment one of these to build packages during the build process.
# This is done automatically if you set DISTRO (see above)
INHERIT = "package_ipk"
# INHERIT = "package_tar"
# Add the required image file system types below. Valid are
# jffs2, tar(.gz|bz2), cpio(.gz), cramfs, ext2(.gz), ext3(.gz)
# squashfs, squashfs-lzma
#IMAGE_FSTYPES = "jffs2 ext3"
# Uncomment this if you want to keep the temporary rootfs
# diretory, this can be useful during development.
# (Note that this rootfs is NOT usuable as NFS export.)
IMAGE_KEEPROOTFS = "1"
# Uncomment this to disable the parse cache (not recommended).
# CACHE = ""
# Uncomment this if you want BitBake to emit debugging output
# BBDEBUG = "yes"
# Uncomment these two if you want BitBake to build images useful for debugging.
# Note that INHIBIT_PACKAGE_STRIP needs a package format to be defined.
# Also note that OE now produces -dbg packages which contain debugging symbols.
# DEBUG_BUILD = "1"
# INHIBIT_PACKAGE_STRIP = "1"
# Uncomment these to build a package such that you can use gprof to profile it.
# NOTE: This will only work with 'linux' targets, not
# 'linux-uclibc', as uClibc doesn't provide the necessary
# object files. Also, don't build glibc itself with these
# flags, or it'll fail to build.
#
# PROFILE_OPTIMIZATION = "-pg"
# SELECTED_OPTIMIZATION = "${PROFILE_OPTIMIZATION}"
# LDFLAGS =+ "-pg"
# Uncomment this to enable parallel make.
# This allows make to spawn mutliple processes to take advantage of multiple
# processors. Useful on SMP machines. This may break some packages - we're
# in the process of marking these so let us know if you find any.
# PARALLEL_MAKE = "-j 4"
# Uncomment to run multiple bitbake threads in parallel.
# Bitbake can do multiple jobs in parallel: Its a good idea make use of
# all available resources: e.g. to download sources while some other
# piece of software is compiled.
BB_NUMBER_THREADS = "2"
# Uncomment this if you want BitBake to emit the log if a build fails.
BBINCLUDELOGS = "yes"
# Specifies a location to search for pre-generated tarballs when fetching
# a cvs:// URI. Outcomment this, if you always want to pull directly from CVS.
#CVS_TARBALL_STASH = ""
# Uncomment this if you want to install shared libraries directly under their SONAME,
# rather than installing as the full version and symlinking to the SONAME.
# PACKAGE_SNAP_LIB_SYMLINKS = "1"
# EDIT THIS FILE and then remove the line below before using!
#REMOVE_THIS_LINE:="${@bb.fatal('Read the comments in your conf/local.conf')}"
Como podemos observar el archivo está muy comentado (partí de una plantilla de ejemplo). Los campos mas importantes son
- DL_DIR: Especifica la ruta en la que se guardarán todas las fuentes que se descarguen y sus parches, para después compilarlas.
- BBFILES: Lugar en el el que se encuentran los archivos de tareas para bitbake (con extensión .bb). Dentro de éste directorio hay un subdirectorio por paquete a compilar, en el cual se encuentran los *.bb que dirigirán la compilación.
- BBMASK: Paquetes que NO serán compilados (se pueden expresar como una Expresión Regular). Desaconsejo totalmente descomentar ésta línea, puesto que aunque haya paquetes que a priori nos parezca que no serán útiles, éstos pueden representar dependencias que detendrán la compilación (y la compilación puede tardar hasta 36 horas según la máquina que utilices, así que "fastidia" bastante que ésto suceda a mitad del proceso).
- MACHINE: Máquina destino para la que se va a compilar.
javieralso@rigoberto:~/OE$
javieralso@rigoberto:~$ git clone http://repo.or.cz/r/openembedded.git
javieralso@rigoberto:~$ export BBPATH=~/OE/build:~/OE/openembeddedjavieralso@rigoberto:~/OE$ bitbake opie-imageNOTE: Running task 4827 of 4834 (ID: 39, /home/javieralso/OE/openembedded/recipes/ipkg-utils/ipkg-utils-native_1.6+cvs20050404.bb, do_package_stage)
NOTE: Running task 4828 of 4834 (ID: 23, /home/javieralso/OE/openembedded/recipes/quilt/quilt-native_0.48.bb, do_qa_staging)
NOTE: Running task 4829 of 4834 (ID: 18, /home/javieralso/OE/openembedded/recipes/images/opie-image.bb, do_package_update_index_ipk)
NOTE: Running task 4830 of 4834 (ID: 25, /home/javieralso/OE/openembedded/recipes/quilt/quilt-native_0.48.bb, do_package_stage)
NOTE: Running task 4831 of 4834 (ID: 15, /home/javieralso/OE/openembedded/recipes/images/opie-image.bb, do_distribute_sources)
NOTE: Running task 4832 of 4834 (ID: 7, /home/javieralso/OE/openembedded/recipes/images/opie-image.bb, do_package_stage_all)
NOTE: Running task 4833 of 4834 (ID: 14, /home/javieralso/OE/openembedded/recipes/images/opie-image.bb, do_rootfs)
NOTE: Running task 4834 of 4834 (ID: 8, /home/javieralso/OE/openembedded/recipes/images/opie-image.bb, do_build)
NOTE: Tasks Summary: Attempted 4834 tasks of which 0 didn't need to be rerun and 0 failed.
javieralso@fry:~/OE$Instalación
Para la instalación vamos a suponer que partimos de la misma SD de la que partimos cuando fuimos a instalar la imagen Emdebian que creamos en una receta anterior. Como ya sabemos, tendremos dos particiones, una en la que residirá el kernel y otra, la segunda, en la que instalaremos el sistema. Aunque bitbake descargó los fuentes y compiló el núcleo, no vamos a utilizar éste, ya que entre otras cosas existirá en él el bug que comentamos sobre la pantalla. Por ello deberemos tener en nuestra máquina aún el directorio con la compilación que en su día hicimos del núcleo y la imagen copiada en la partición 1 de nuestra SD. La instalación es tan sencilla como mover el archivo Angstrom-opie-image-glibc-ipk-2010.7-test-20100922-mini2440.rootfs.tar.gz (en tu caso puede que se llame de forma distinta) que encontrarás en el subdirectorio comentado anteriormente, a la partición 2 de tu SD y después descomprimir ahí su contenido. Después de ésto aún tenemos que sustituir los módulos del núcleo que se ha compilado con la distribución por los módulos del núcleo que compilamos nosotros. Borramos el contenido del directorio lib/modules de la tarjeta ¡¡¡¡OJO!!! DE LA TARJETA a ver si la vais a liar.... Después volvemos al directorio de nuestra máquina en el que compilamos el núcleo e instalamos los módulos del núcleo:javieralso@rigoberto:~/kernel/mini2440# sudo make INSTALL_MOD_PATH=/media/rootfs/ O=../kernel-bin/ modules_install
...............................................................................................
...............................................................................................
Lots and lots of INSTALL messages
...............................................................................................
...............................................................................................
Referencias
[ show comments ]
blog comments powered by Disqus